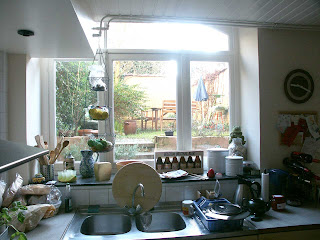
By special request I am covering levels in Photoshop today. Open a picture in Photoshop and you might find something like this image where the meter was reading what the light was doing outside. If you now click on "Image" on the top menu bar the "Adjustments" then levels you will see agraphic display of the highlight, midtone and shadow regions of the picture. Under the graph it will say 0(shadow) -1.0(mid-tone) - 250(highlight). Above each figure there is a slider. By dragging the midtone slider to the left (for example) the midtones are lightened - lowering the contrast of the picture. The slider on the right, when moved to the left, will lighten the image. In the following example I have done just that. In the lighter image the sliders now read o, 1.7, 180.

If you want to be really smart you could find a way to keep the image outside from becoming too bright and still retain the interior density. I will away now and do just that - for next time. As mentioned in a previous episode if you make a duplicate layer and do your levels adjustment on that you will find photoshop, rather cleverly, retains your changes in the levels panel, but only if you do the levels adjustment as an adjustment layer, "Layers", "New Adjustment Layer", "Levels" and tick the box that is next to the statement that says "Use Previous Layer to Create a Clipping Mask".
See the following blog


No comments:
Post a Comment