 Choosing the centre image Ctrl+A selects the whole image, Ctrl+C copies the selection then if you click in the area of the background picture with the large empty space and then click Ctrl+V - you will have pasted the 2nd (middle) image into the picture. Do the same with the 3 rd shot to end up with 3 images together. At this stage the images can end up anywhere in the scene so.
 Using the Vectot tool click on the middle images layer and move it to where you want and the same with the other image. You can use this technique with as few or as many images as you can fit into your computers memory. I have ended up with file sizes of over 100Mb-things can slow down an awful lot if you go for the full 360 degrees.
 This illustrates the Vector or Moving tool. A very useful device. If you right click on the area you want to move a menu pops up showing the layers so you just click on the layer you want then move into potition. If all you want is to have your pictures next each other you can stop there, or, if you want to go for the panorama then move the layer into its appximate postion.
 Ready to crop for a Triptych.
- The 3 subjects I have chosen for this exercise are not the easiest as the sky is darker towards the right. This was due to my using a Polarising filter.
 The top image (ie the middle one) has it's left side erazed with a soft brush erazor.
 You will also notice that I have needed to put in some adjustment layers to make blending easier. I used Levels in the adjustment layers as the sky was giving me problems.
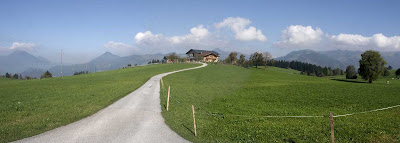
Like this.- And Finally (I straightened it up a bit)


2 comments:
o-k
it will take me some time to go through all the steps but very useful indeed.
Great work.
Post a Comment